


Invoice & online payments
Make it easy for clients to book and pay for your services–all in one file.
“
”
July 19, 2026
All there is to know about design invoice templates
This handy design invoice template helps designers and other creatives send out professional invoices with details about their work, rates, and payment terms to sign clients and request payments. It ensures that they receive payments in time and comply with regulations.
Creatives tend to work as freelancers or on a contractual basis and regularly need to bill their clients for their services.
A clean, structured invoice template ensures you get paid accurately and on time while reinforcing your brand identity. The template also eliminates manual errors, saves time, and provides legal protection with clear payment terms.
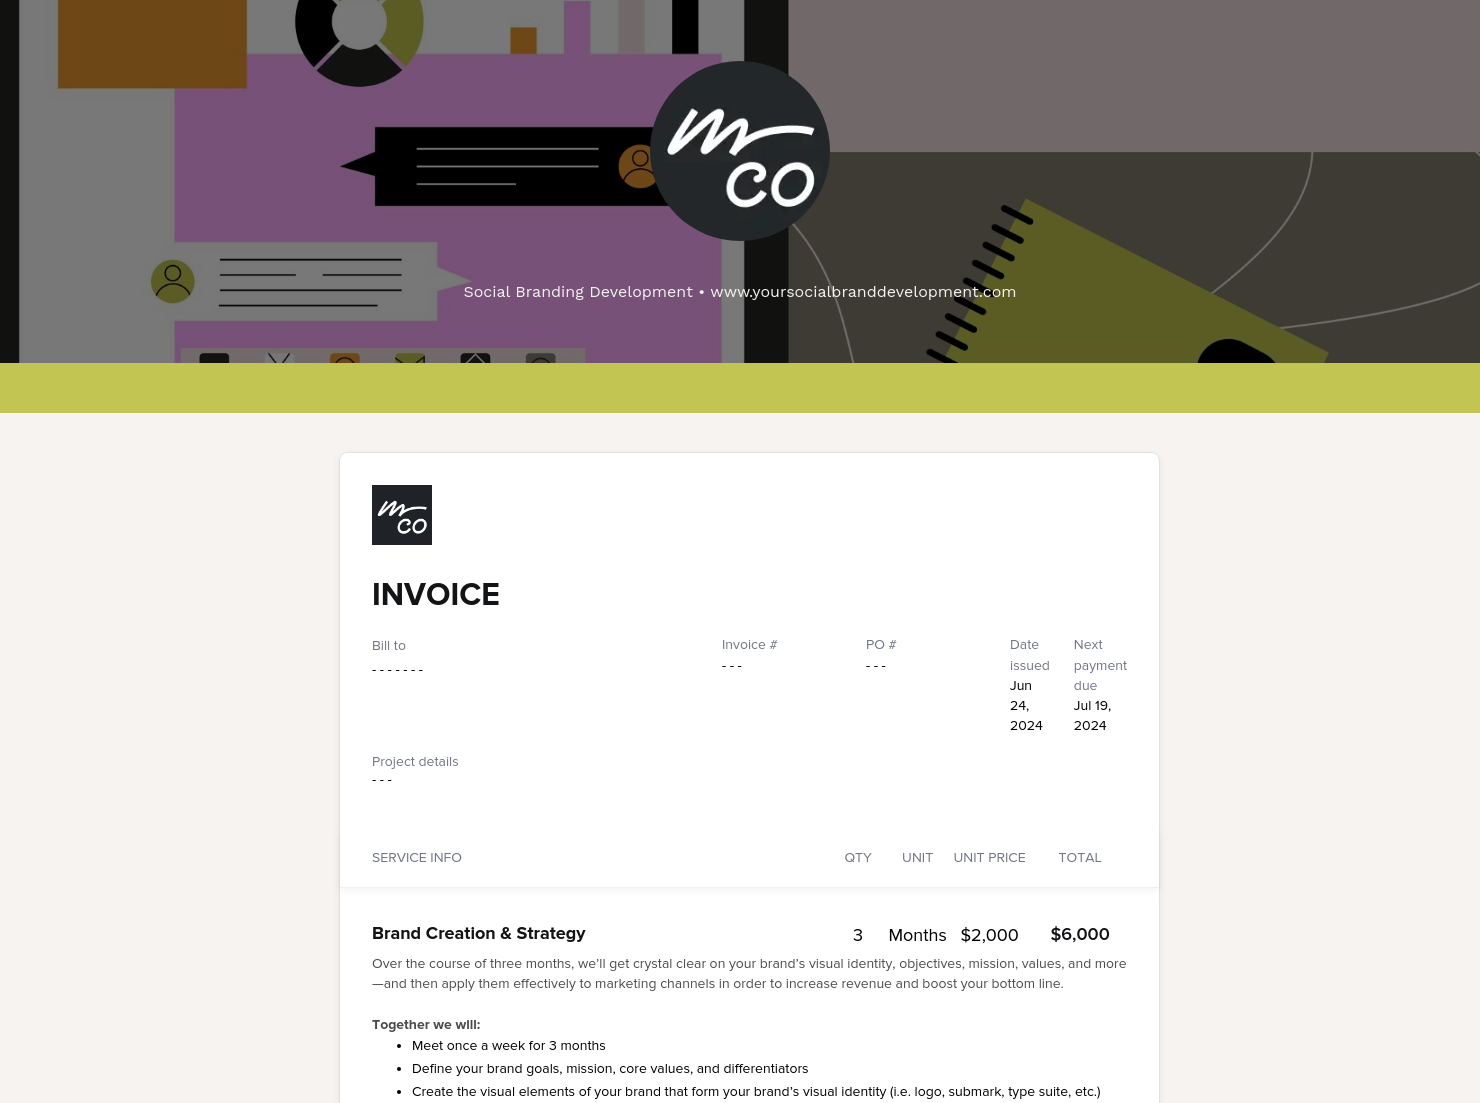
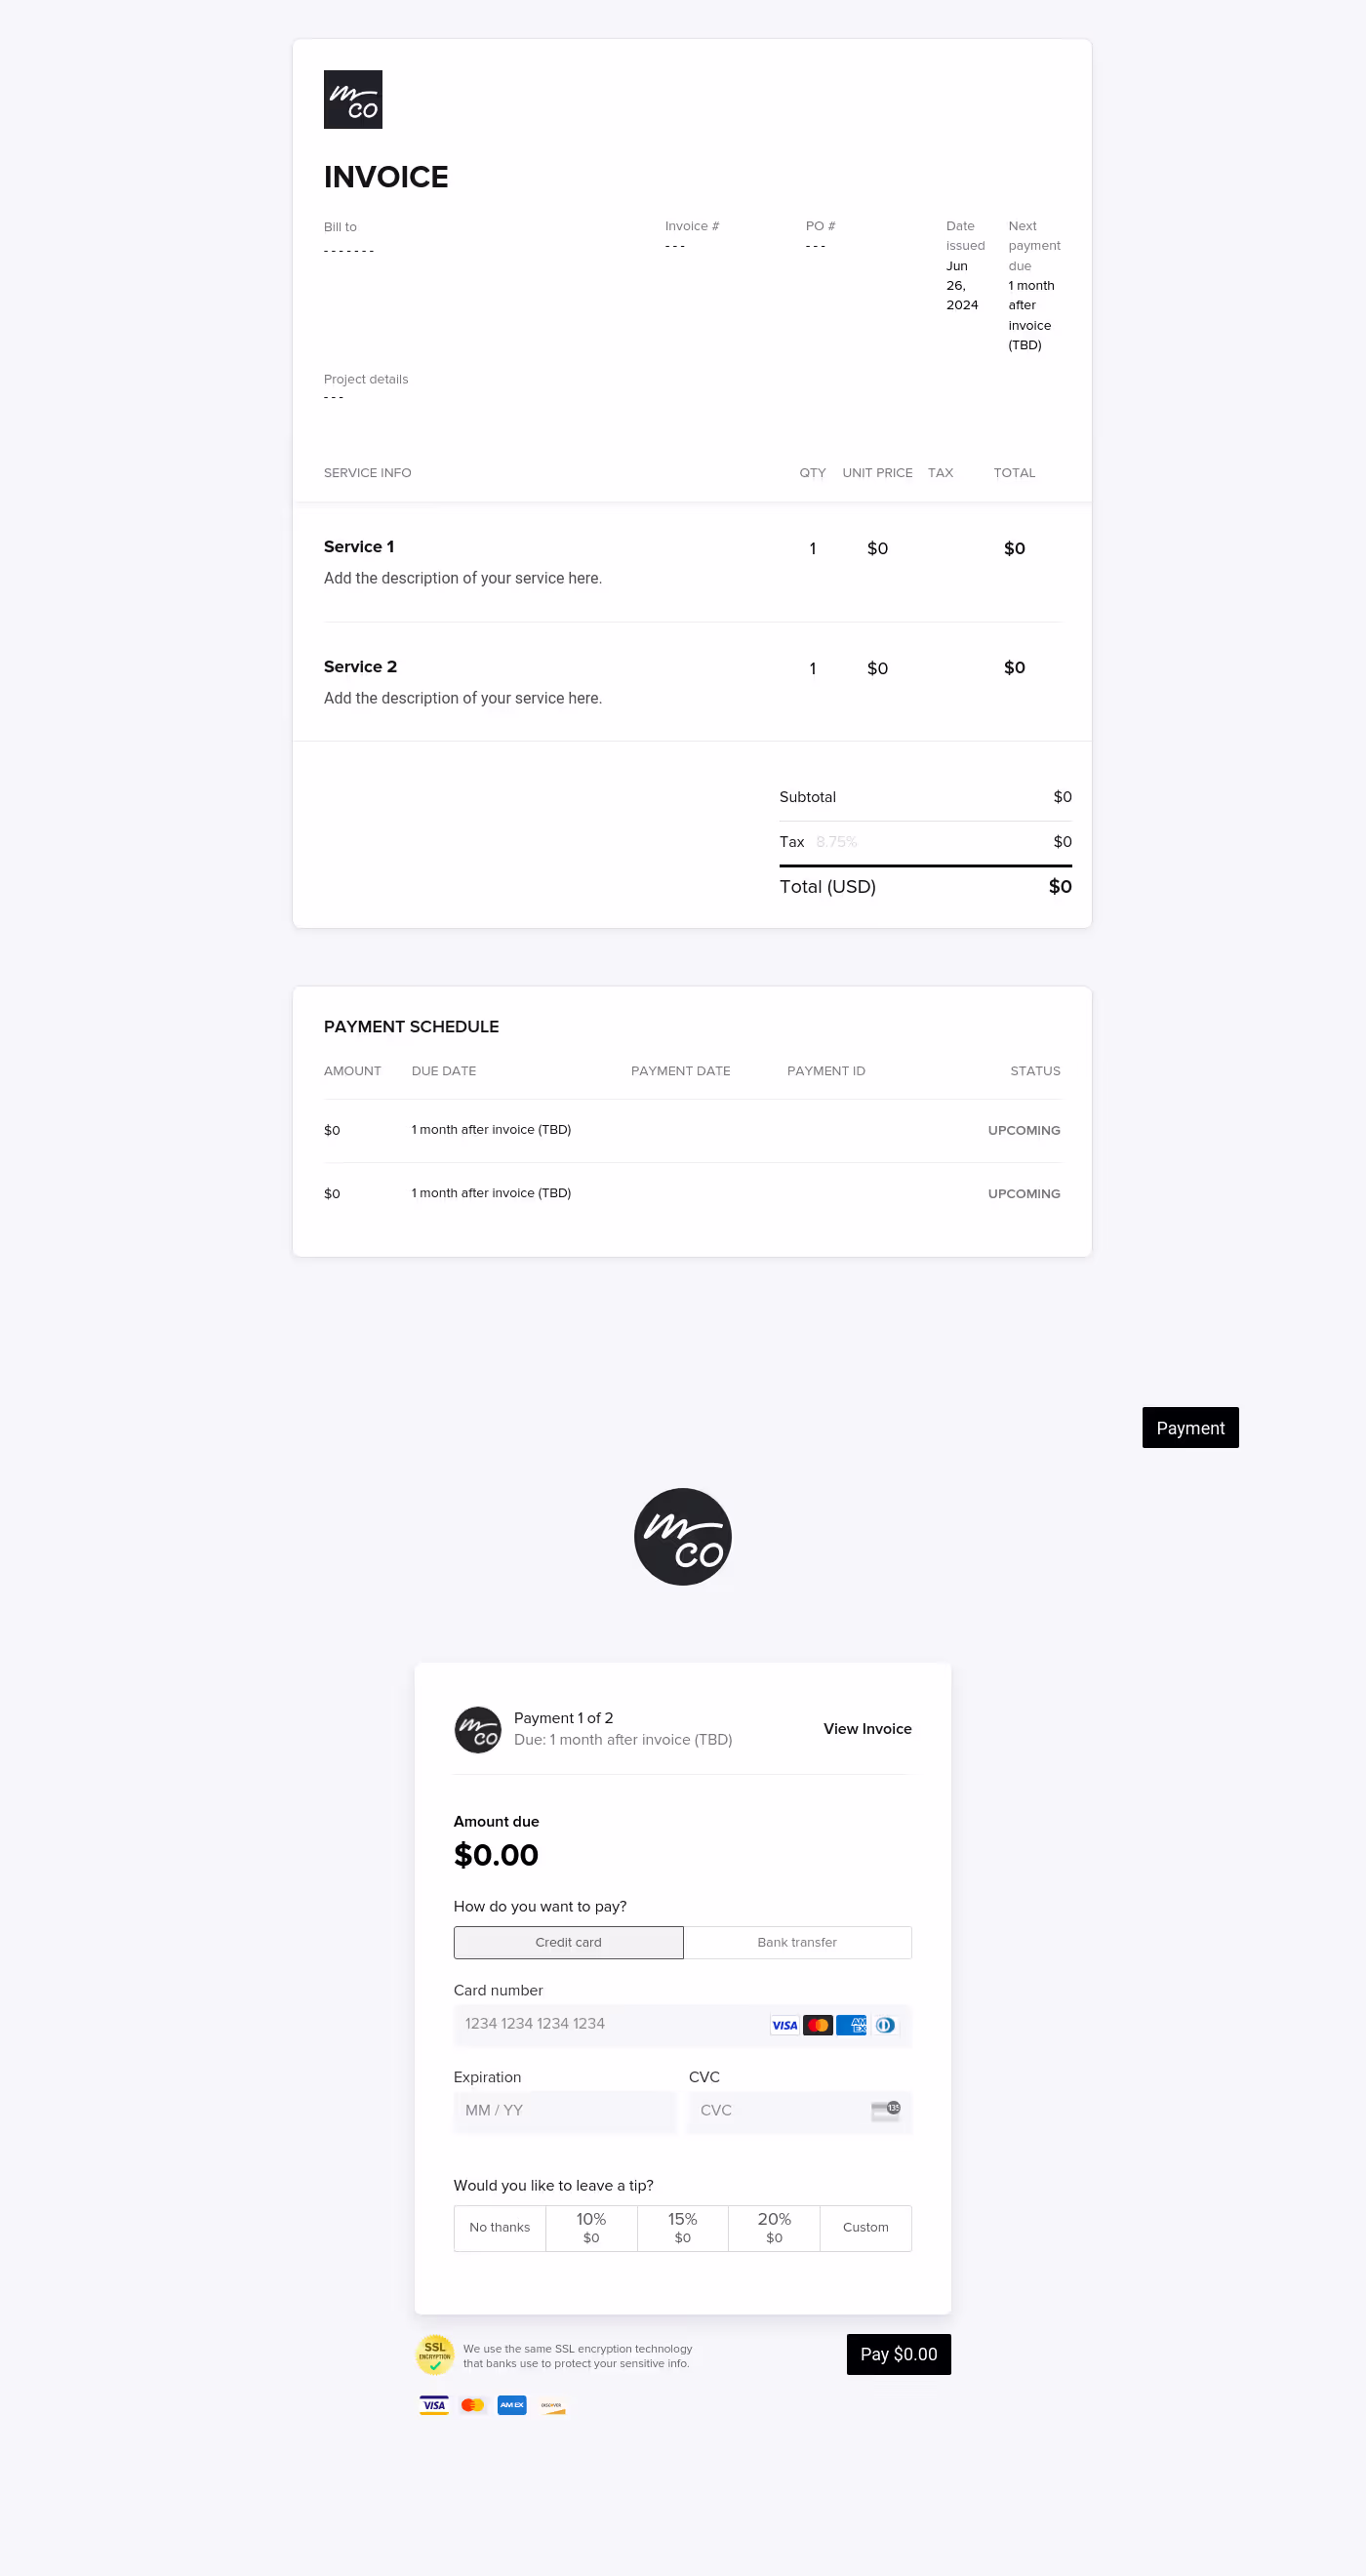
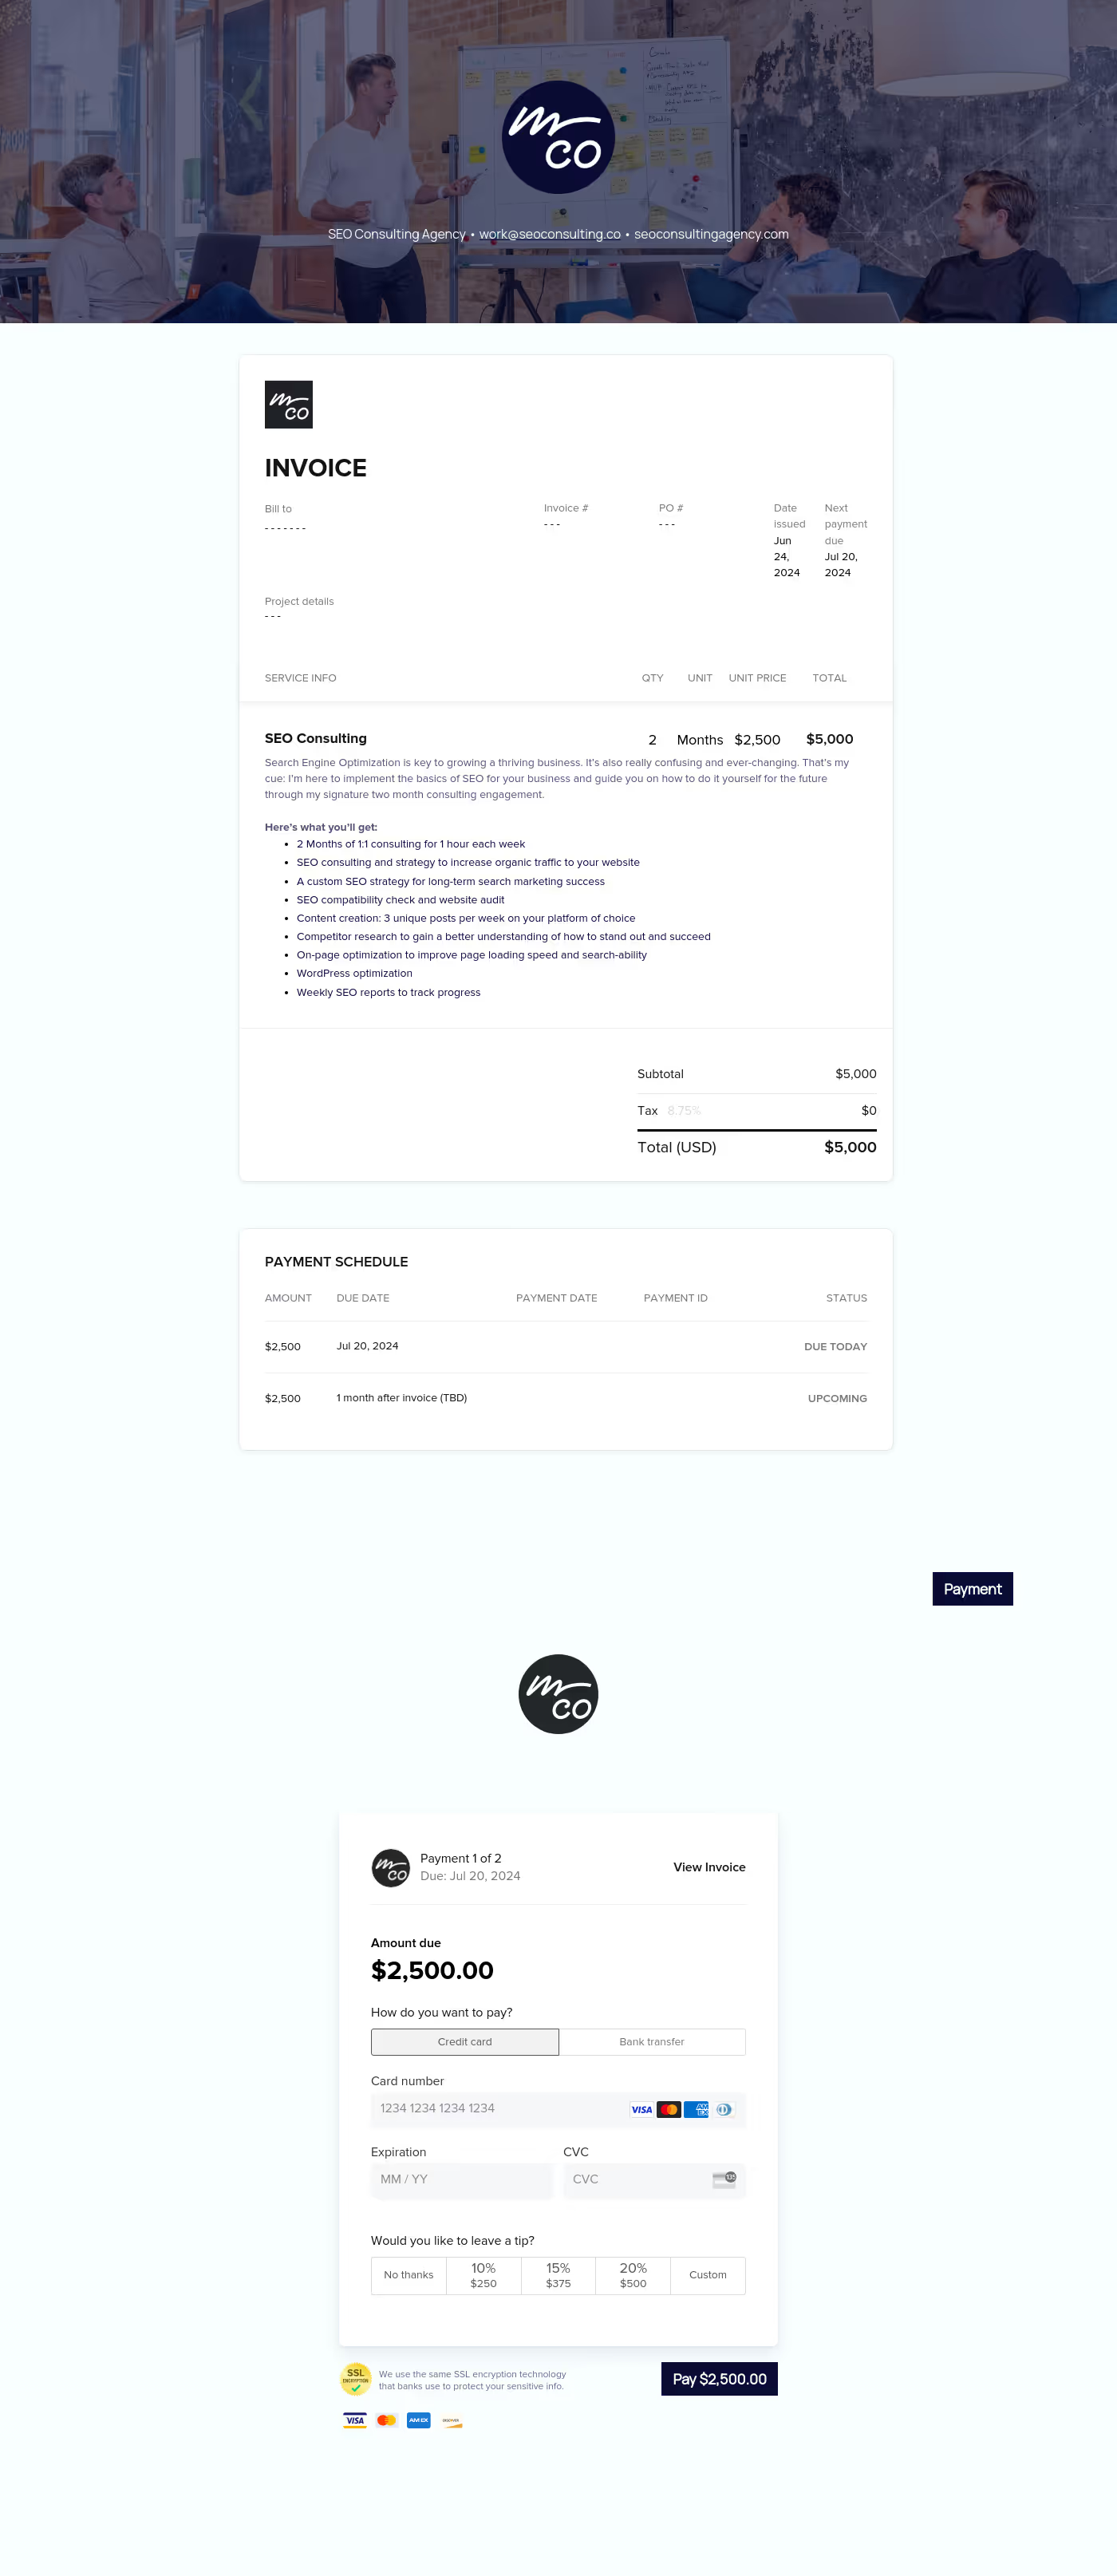
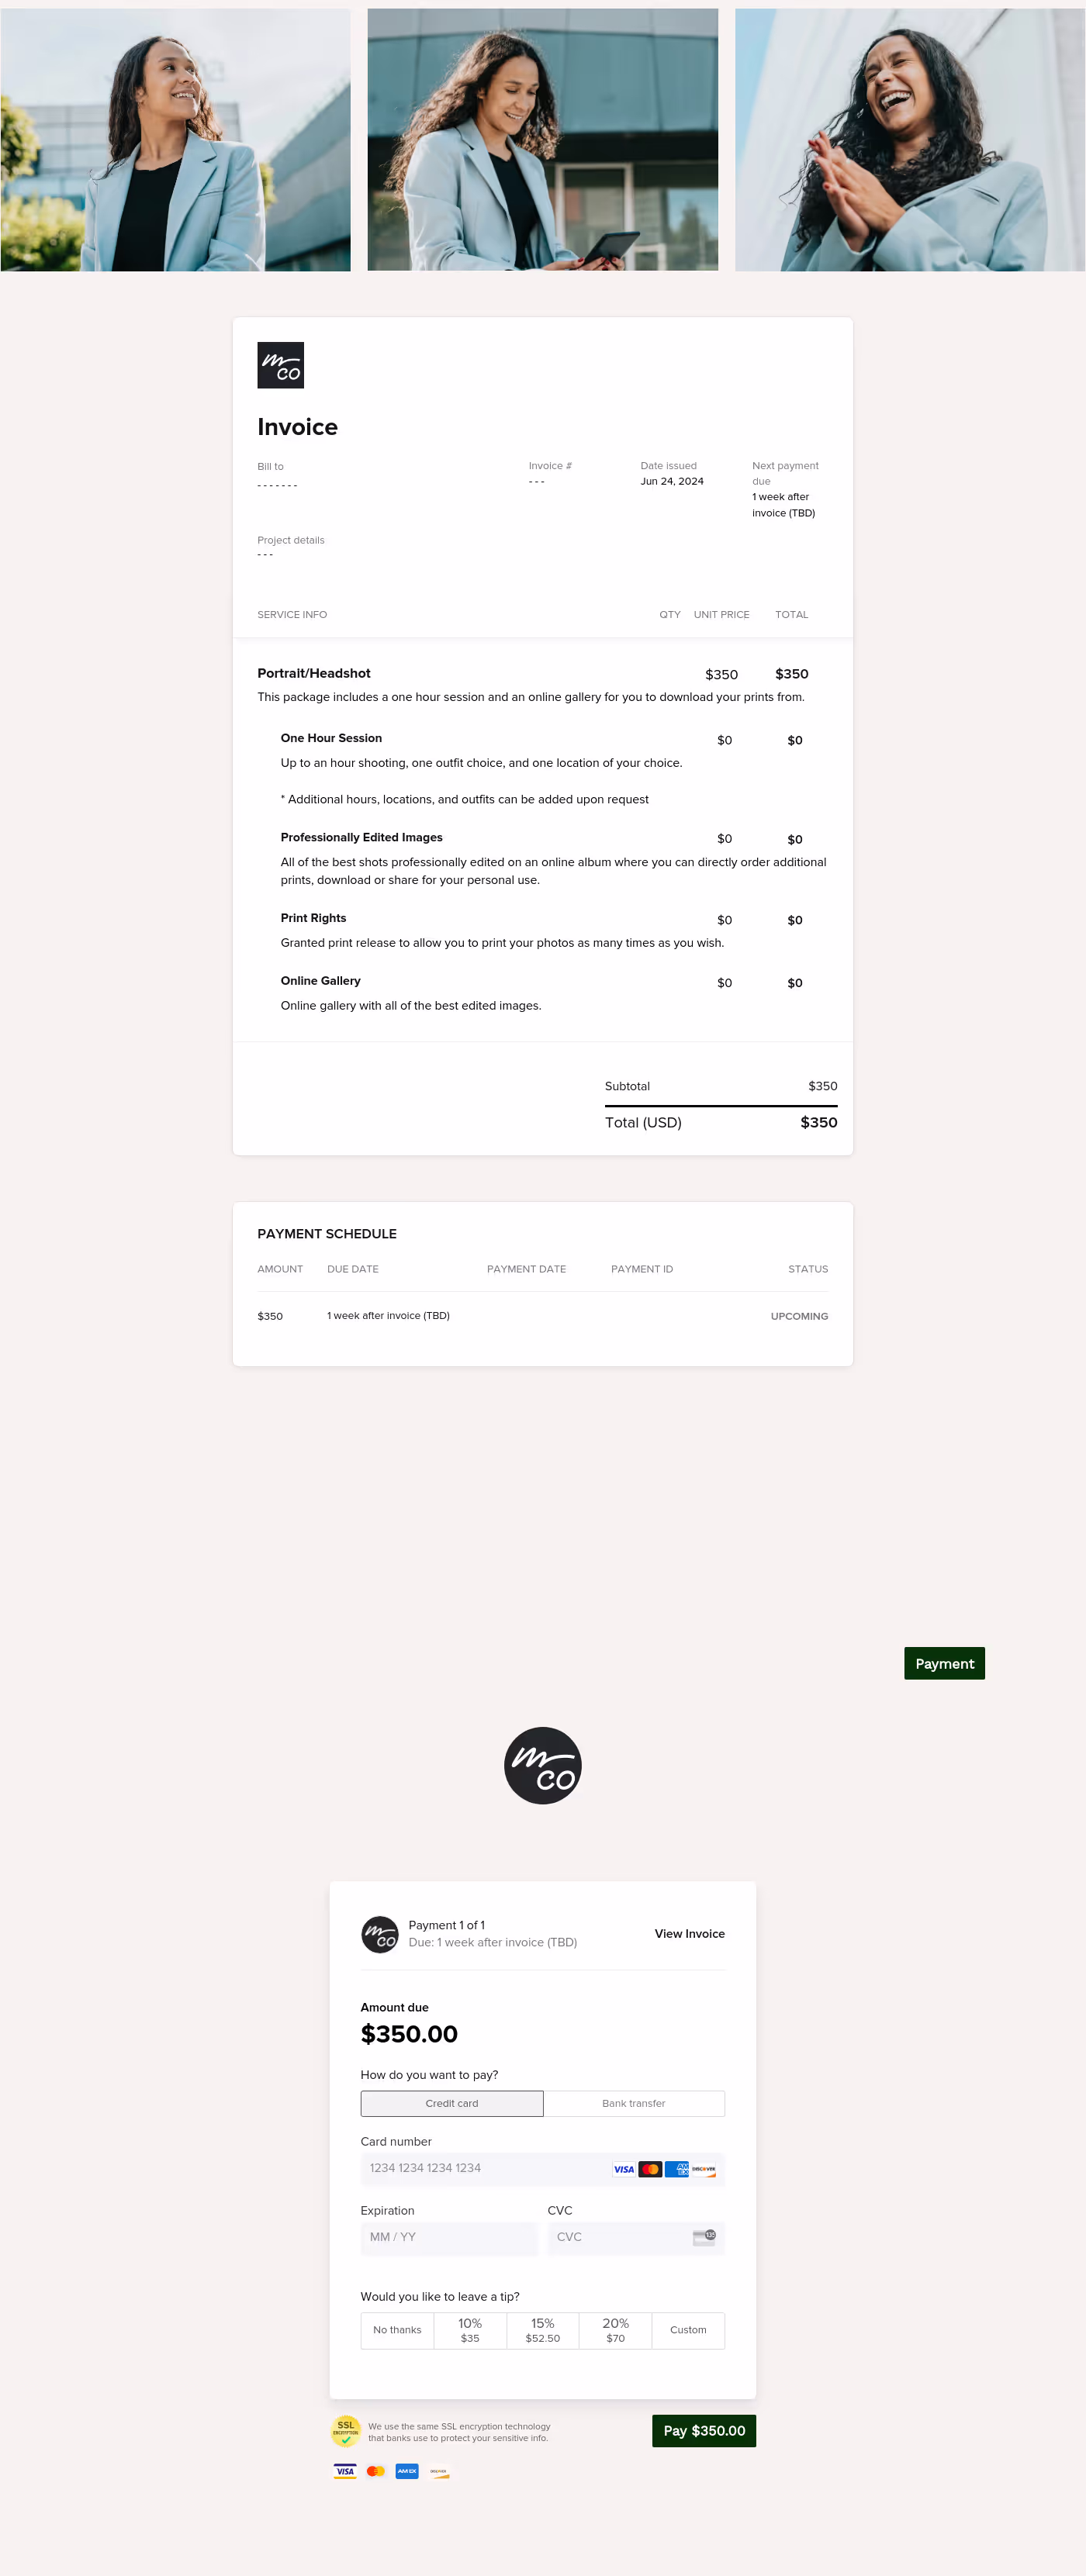
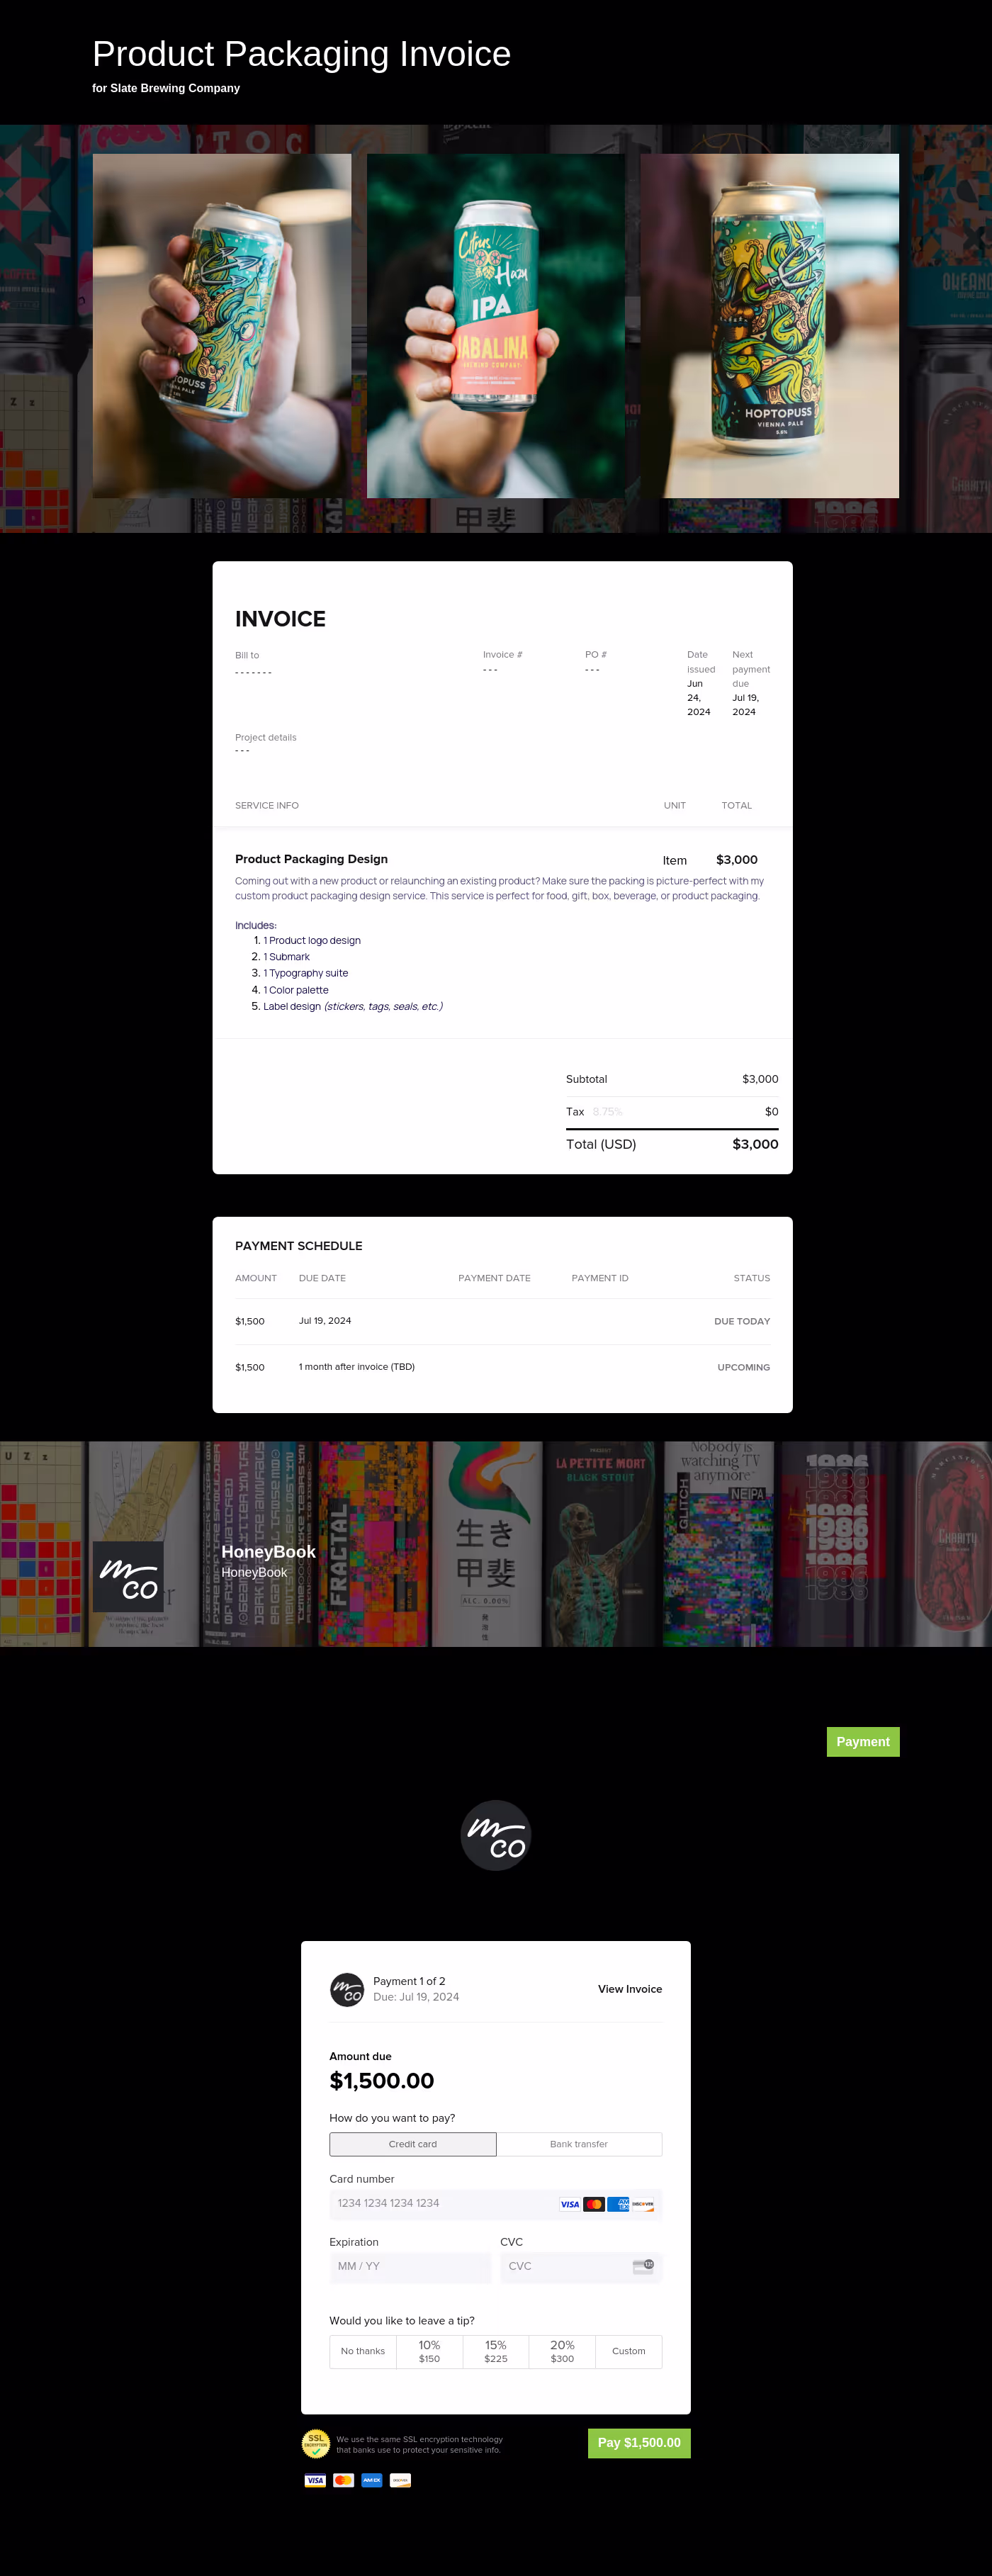
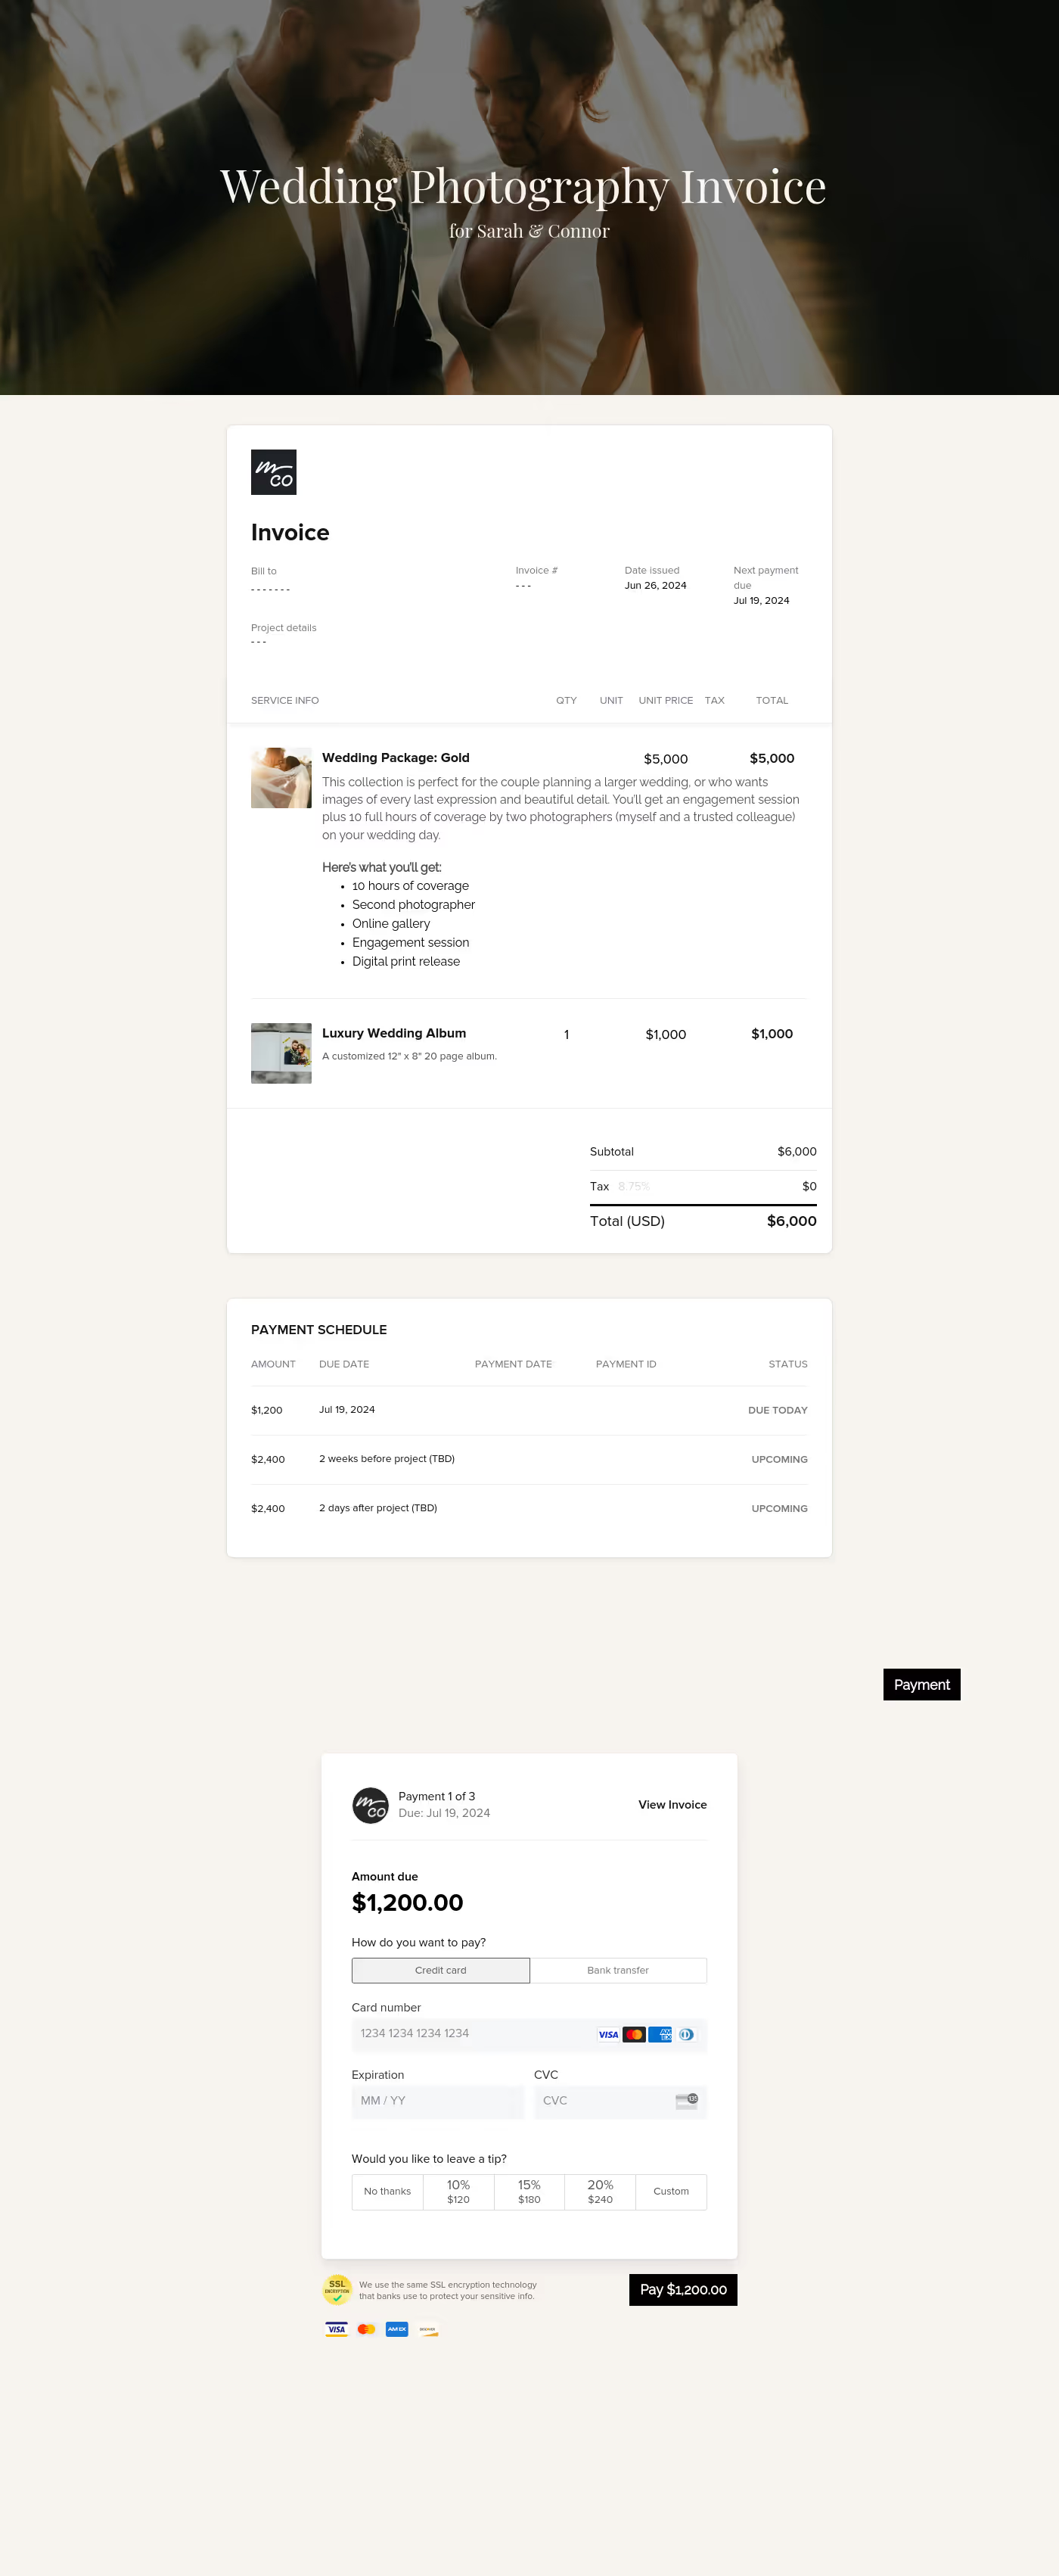
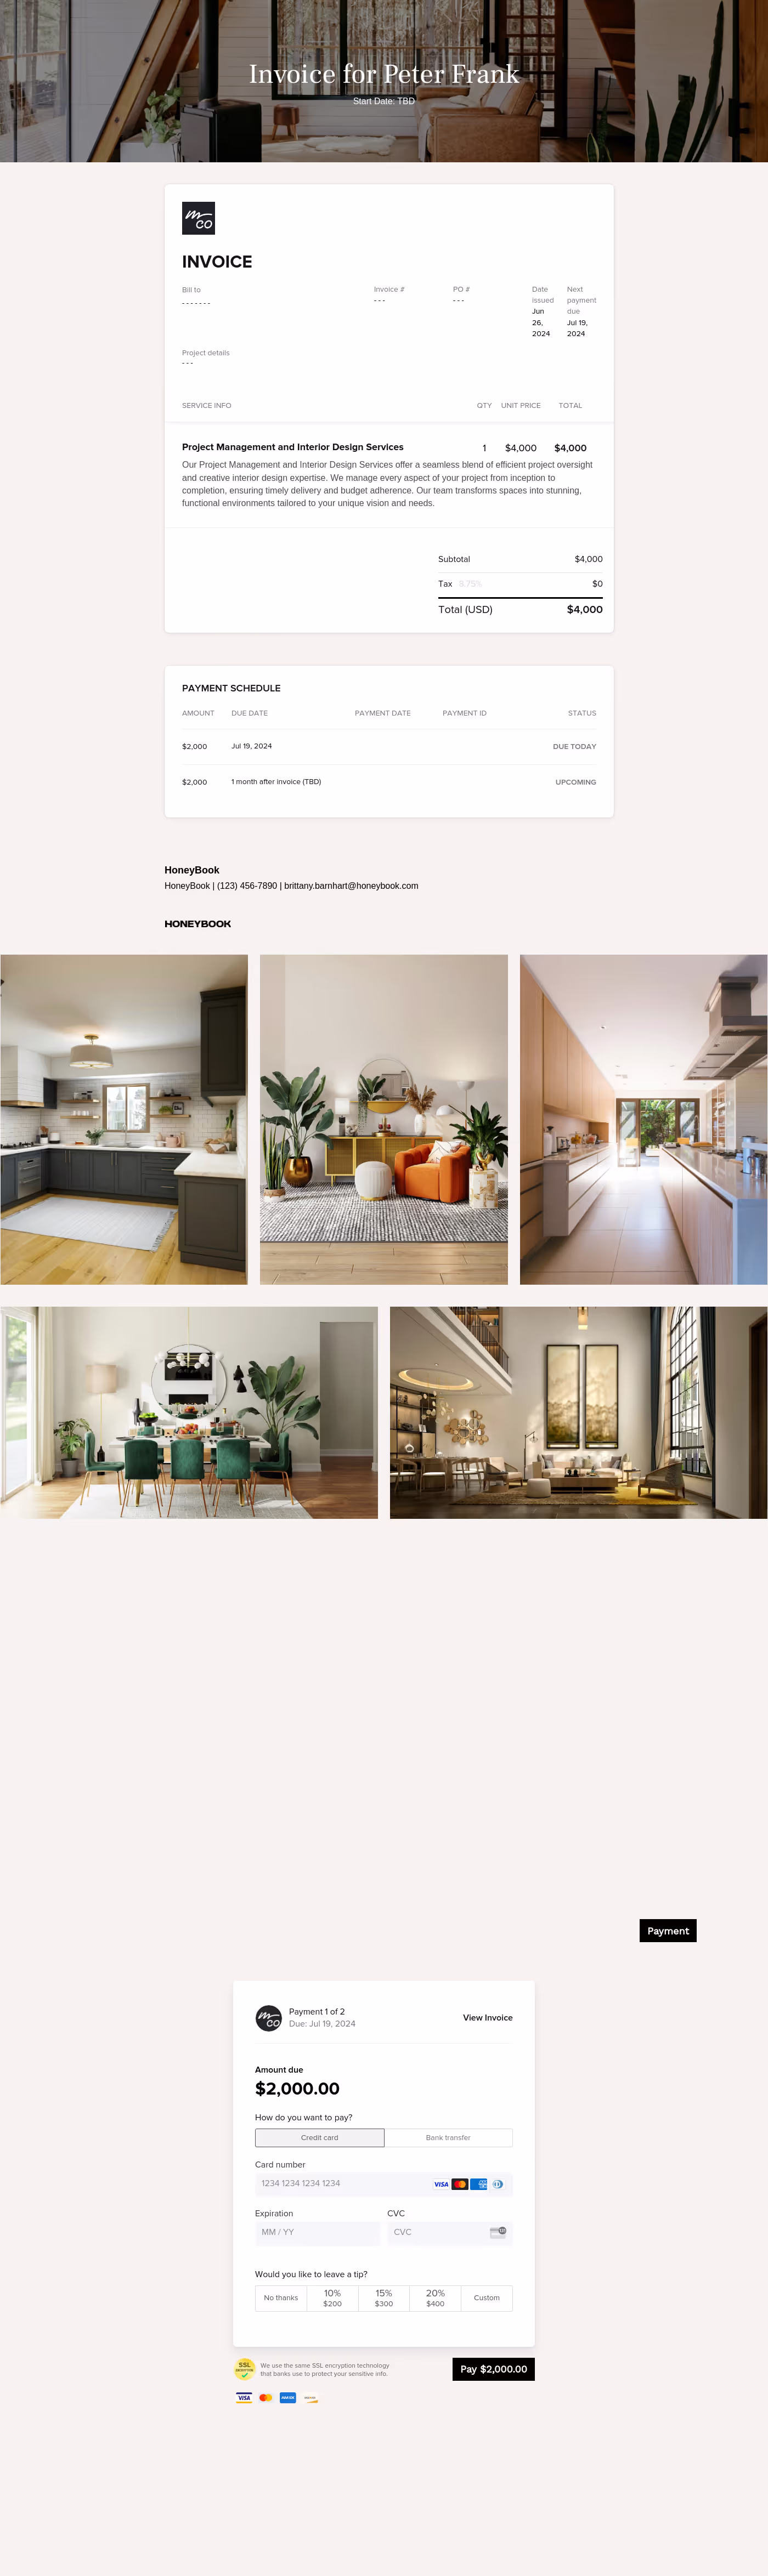
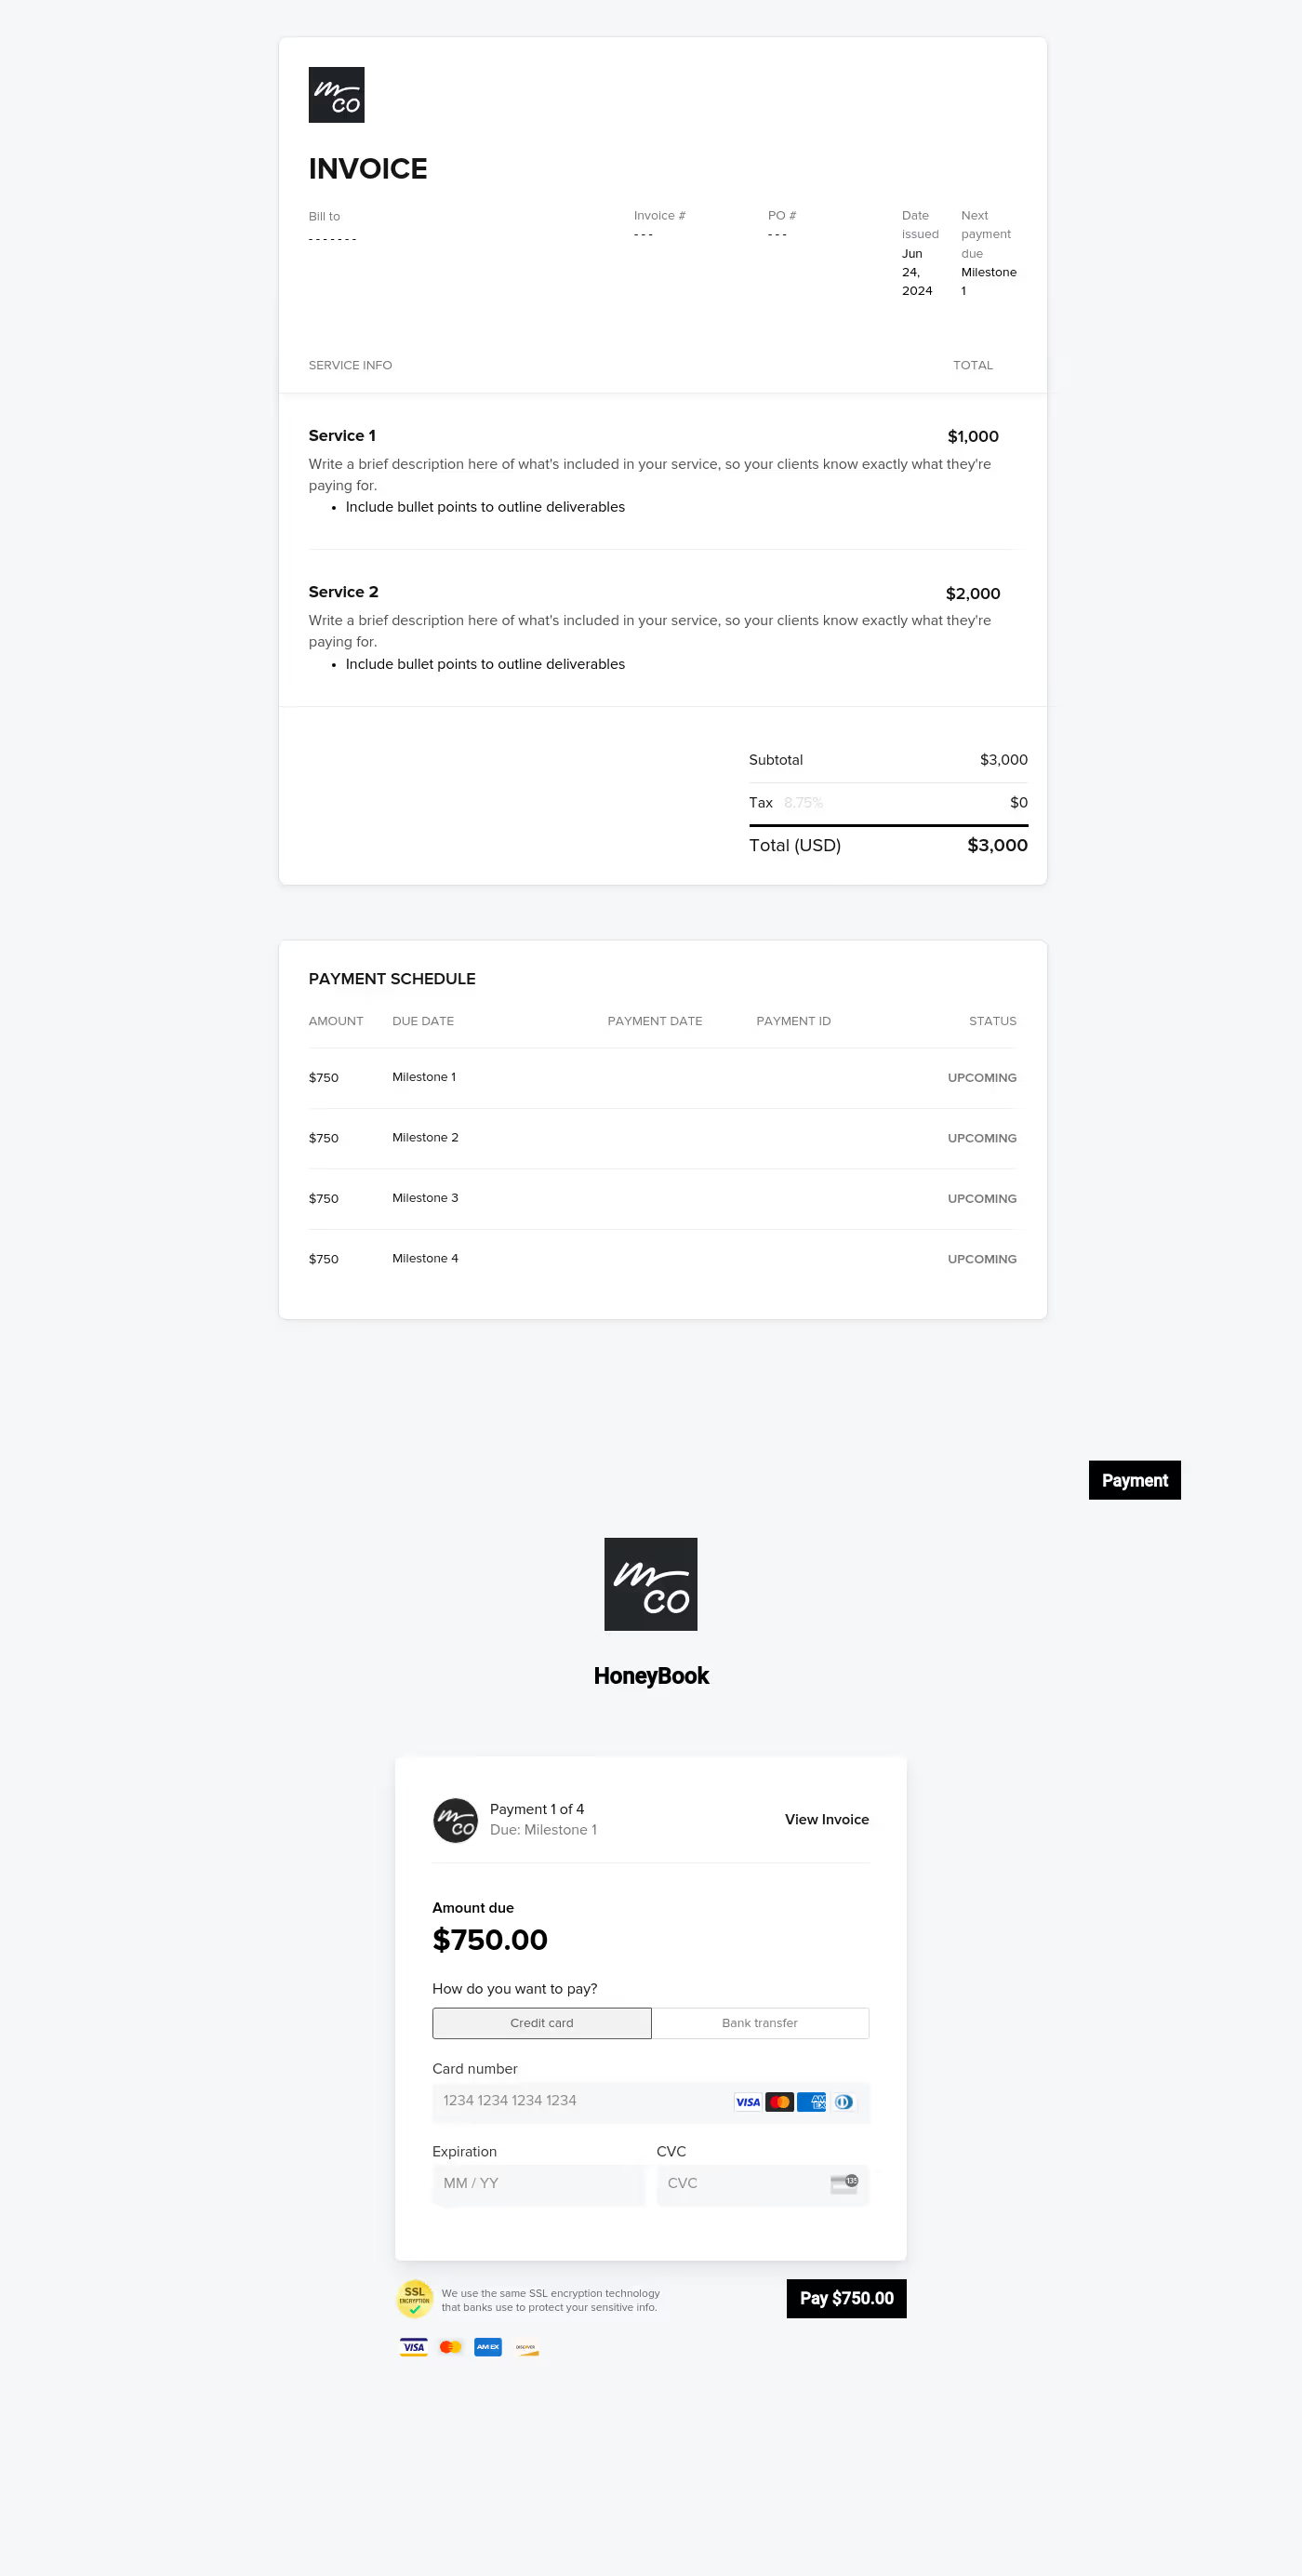
A professional design invoice features several basic and essential components related to getting paid for your services, such as the invoice amount and services rendered.
These include:
- Business contact details: Your name (or studio name), logo, address, email, and phone number.
- Client information: The name and address of the individual or company being billed.
- Invoice details: Invoice number, issue date, and payment due date.
- Itemized Project List: Detailed descriptions of deliverables (e.g., "Logo Suite Design," "8-hour Wedding Coverage," or "Photo Retouching").
- Rate Structure: Your charges per hour, per project, or per month.
- Subtotal, Taxes, and Fees: Breakdown of the base cost, any applicable sales tax (GST/VAT), and incidental expenses (like travel or equipment rentals).
- Total Amount Due: The final figure prominently displayed.
- Payment Methods: Clear instructions on how to pay (bank transfer details, PayPal link, or credit card portal).
- Usage Rights & Licensing: A brief note on the usage rights being transferred upon payment (e.g., "Personal use only" or "Full commercial rights").
- Terms and Conditions: Late fee policies, deposit credits, and cancellation terms.
For designers and creatives, the most critical element to watch is the Transfer of Rights clause. Unlike selling a physical product, creative work involves intellectual property; your invoice should state that ownership or usage licenses only transfer to the client once the final balance is paid in full.
Additionally, the itemized deliverables, along with the unit and description, enable you to prevent scope creep. Instead of a vague "Photo Shoot" line item, list the exact number of retouched images or design concepts included.
Use this design invoice template to formalize agreements, secure upfront deposits, and trigger final payments.
- Project Kickoff: Requesting a non-refundable booking deposit.
- Milestones: Billing for completed phases of a long-term project.
- Final Delivery: Requesting the remaining balance before handover.
- Revisions: Charging for extra work outside the original scope.
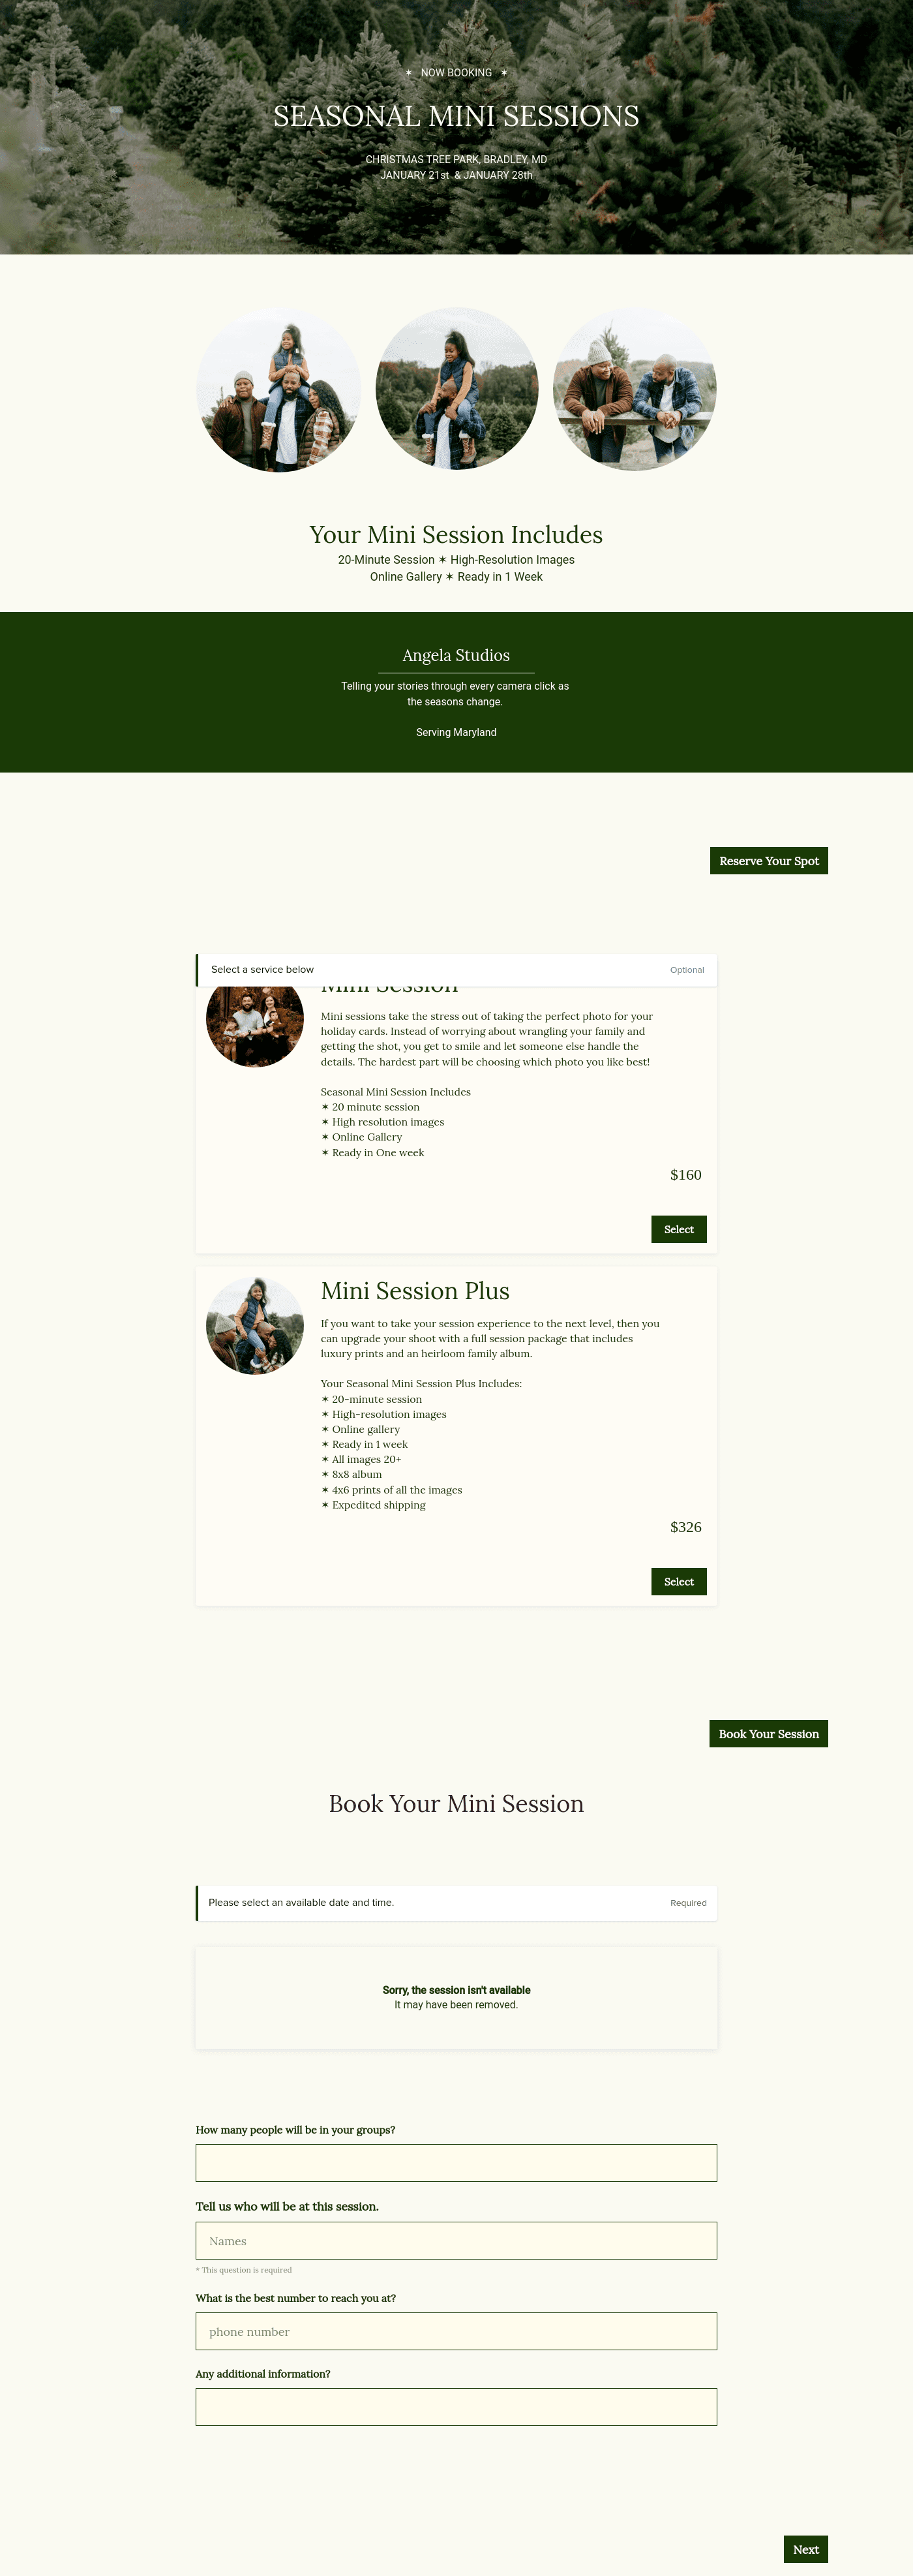
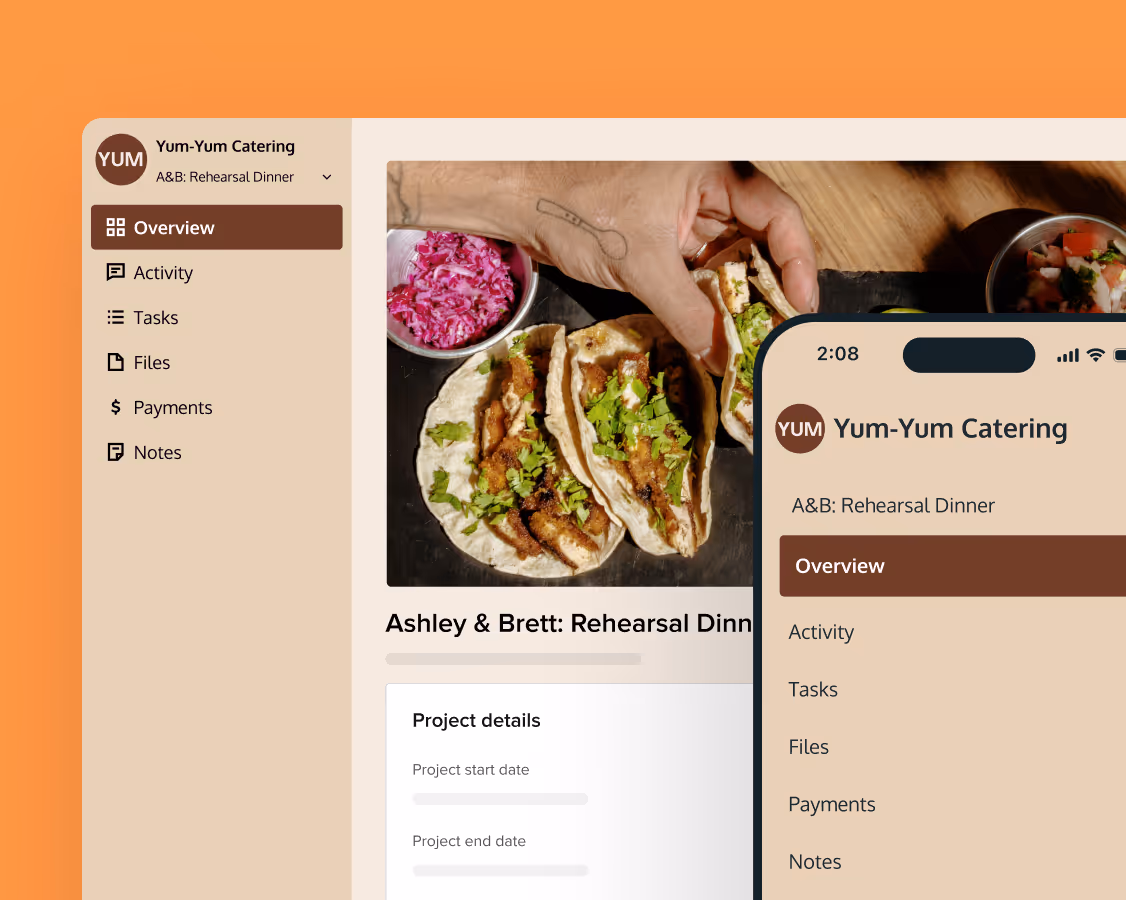
Catering has a lot of moving parts, and the menu sits in the center. If your catering menu is scattered across emails, texts, and screenshots, mistakes show up at the worst time.
A structured menu template helps in practical ways.
- Builds client trust and a professional first impression.
- Speeds approvals by making choices simple.
- Reduces payment disputes by documenting totals and terms.
- Saves time by cutting back and forth.
That means fewer surprises for clients and fewer fire drills for you.
Get started with a design invoice
Stop wasting time on administrative work and start getting paid for your work. With this design invoice template, your design and creative business gains professional appeal and helps you get paid faster while keeping your focus where it belongs: your creativity.
FAQs
Below are quick answers to common questions from caterers building a catering menu that clients can approve with confidence.
Always send a deposit invoice (typically 25–50% of the amount) before starting any creative work. This "buy-in" ensures the client is committed and covers your initial time and overhead. The second invoice can be sent at project completion.
Yes, provided your invoice or contract defines a "revision cap" (e.g., two rounds). If the client exceeds this, issue a supplementary invoice or add a "Change Request" line item to the final bill.
Instead of waiting until the end, use the "Milestones" feature in your template to set up a payment schedule. This keeps your cash flow steady by letting you bill for specific phases, like "Draft Delivery" or "Final Review," as you complete them.
In the "Payment Schedule" section, you can add multiple payments and choose how to split the HoneyBook invoice total, either by custom amounts, equal divisions, or percentages. You can also set specific due dates based on the invoice date, project date, or even custom milestones.
To add tax, toggle the tax setting on within your invoice settings and enter your rate. You can then select the "Tax" checkbox for each individual item or service to ensure the correct amount is automatically calculated and added to the total.
You can generate a direct link to your template by selecting "Share template" from the three-dot menu in your template library. This link allows peers or friends to view and save the template directly into their own accounts for their own use.
Related templates


Related Templates
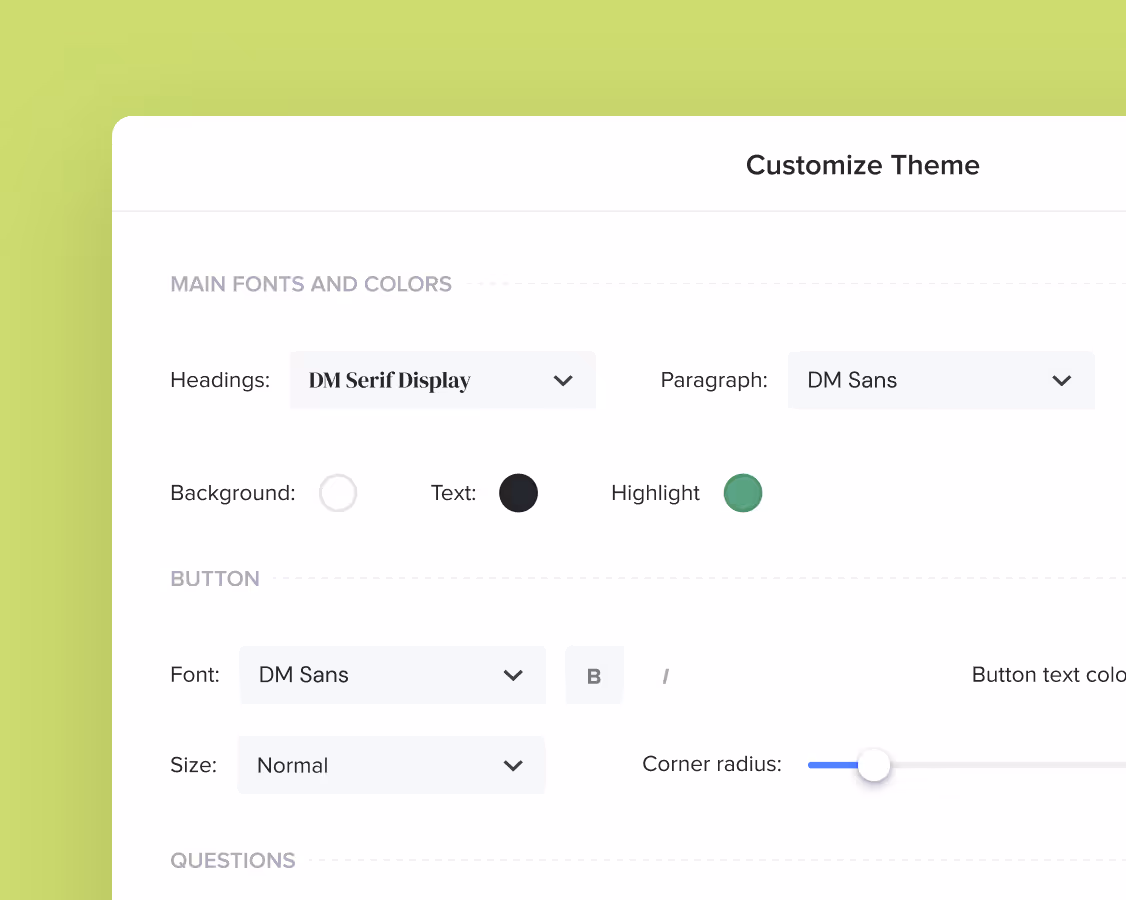
Make it your own
Fully customize the template to fit your needs. Quickly apply your company branding with just a few clicks.
Share with clients
Create exceptional client experiences through HoneyBook’s dedicated client portal, allowing them to read, review, and take action from any device.
Reuse and scale
Use your customized files with different clients again and again to save time and make managing client interactions that much easier.
Join the 100,000+ businesses growing with HoneyBook.