
When I began tweaking my workflow to match the strategy I’m about to tell you, my bookings went through the roof. You’ve gotta admit, you’re curious right?!
Let’s just say: the method I’m about to share with you is tried and true. I implemented these six simple steps and immediately booked a wedding the following day. And within 30-days, I saw significant progress in my booking rate and booked about 6 weddings within a month’s time. Does that sound like something you’d love to see for your own business? It’s all about my simple communication framework.
Buckle up, I’m about to change your life in six easy steps.
Step 1: Respond quickly & End your emails with a question
This may feel like a slight change, but it’s the #1 way you’ll be able to increase your bookings. When you respond within a couple of hours, you’re showing them that you are 1) excited about working with them, 2) reliable if they have questions and need an answer quickly, 3) reaching them before your competition does.
Make sure you’re infusing your personality into the copy as well. For example, here’s a real-life example of one of my responses to an inquiry that came through for a boudoir session:
“hahahaha ohmygoodness Emma I LOVE YOU. Your message made me laugh and smile and feel all the good feelings. How have you been? It’s been so long since I saw you last!
Remind me where you are these days? Would you be willing to travel to Indy, or like me to come to you?
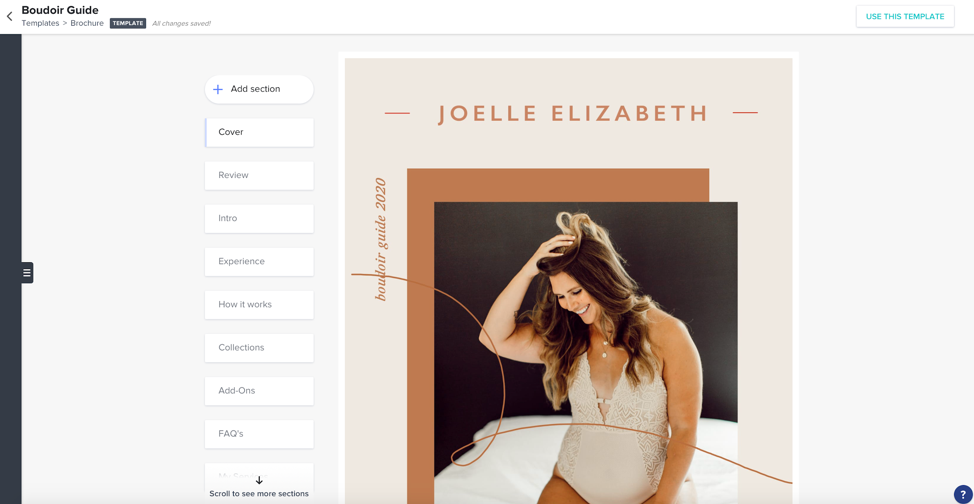
Here’s my boudoir guide for you to look through. It breaks down everything you can expect when you book with me, and includes all of the pricing details.
Do you want me to go ahead and send over the dates I have open?”
[CTA_A title=”Turn more inquiries into booked clients “] The HoneyBook contact form allows you to quickly reply to inquiries with automated follow-ups or questionnaires so you never lose out on a client again.
START FREE TRIAL [/CTA_A]
And that brings me to the last crucial tip in this category: end your emails with a question. Notice how I did exactly this in my response above. Because I ended with a question, this opened up the conversation for us to continue going back and forth about details. And because I was talking to her like a friend, it instantly put her at ease and established a deeper layer of trust.
Spoiler alert: She booked.
Step 2: Set up a consultation with them
Lining up a consultation with your prospective clients helps them to see & feel your personality first-hand. It gives you a chance to get more information than you would over email. And it helps you know if you’re both a good fit.
If you’re both local, you could offer to buy them breakfast or coffee over the weekend. If you’re working with clientele who don’t have a lot of time to spare, then setting up a quick 10-15 minute phone call may be in your best interest.
When you’re on the call, ask them questions like:
- What’s your budget?
- What are the most important parts of the day for you? (weddings)
- Where do you need the most help right now in your biz? (coaching)
- What are you hoping to use these images for? (branding photography)
- How can I help calm any nerves? (boudoir)
Notice how I included a question on their budget. This question will become your new best friend. The key is to know what your baseline is already (if you need help with this, DM me on Instagram!).
When you ask them what their budget is, it gives you an idea of what you’re working with. From there, you can offer custom collections that fit within their budget & still bring you a profit.
[CTA_A title=”Schedule Meetings 2x Faster “] Did you know meeting with a client increases your chances of winning their business by 40%? With the HoneyBook’s online meeting scheduler, simply set your availability and share your link so clients can find a time that works.
START FREE TRIAL [/CTA_A]
Or, you can meet them with:
“I know you mentioned your budget is ____, but I think [insert collection] would be the best fit for you based on what we talked about. Would you be open to setting up a payment plan? I’d love to work with you and want to make sure you’re being taken care of, too!”
They immediately feel thought of, cared for, and are more invested in working with you because you listened to their needs and offered a solution.
Step 3: Email them back with “Here’s what I heard from you”
It’s so important to email your prospective clients a “recap email” after your consultation. The key things to include here are:
1. “Here’s What I heard from You”
Include any bullet points that they brought up. This shows that you were paying attention and heard what matters most to them. Always end this part of the email with, “Am I missing anything?”
2. “Based on what we talked about, here are some options I think would be a great fit.”
Lay out a couple of options that would work really well for them. Make sure you address details like: how much is the deposit? And, when is their remaining payment due?
3. “Here are a couple of sample galleries/case studies for you to look at, as well!”
Give them links for past client work or examples of case studies for coaching so they can get an idea (and get excited!) of what they have to look forward to.
4. “If this all looks good to you, *insert next steps*”
Now it’s time to give them a plan of action. What’s the next step in making it official? Chances are this includes nailing down the option they like best, and then locking in their deposit & online contract. I always end this part with, “Once the contract is signed & your deposit is paid, then we’re all set!”
And, you guessed it, another question at the end: “How does that sound to you?”
Step 4: Follow up in 3 days if you haven’t heard back from them
Sometimes people need a few days to think on it, other times they get so excited or busy with life that they forget to respond.
If you’re not following up with your prospective clients, you’re leaving money on the table.
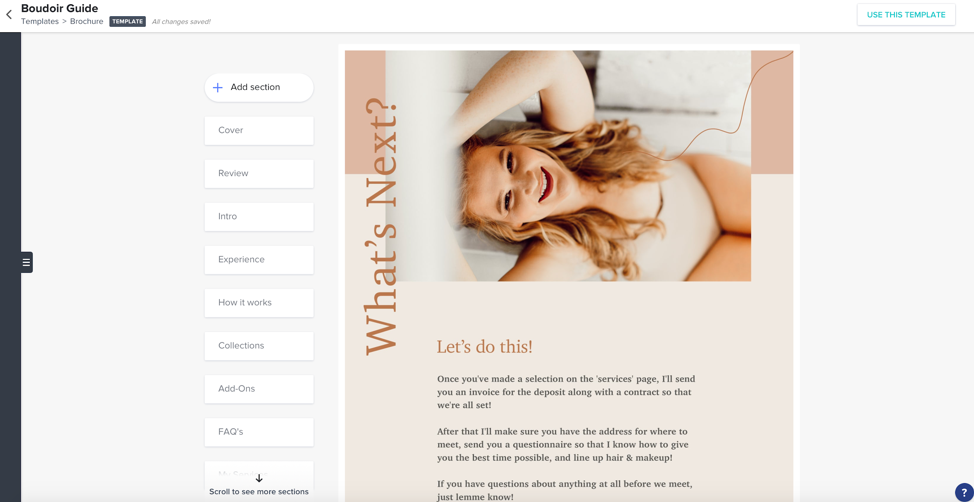
One of the best things about HoneyBook is that you can set up automations to automatically send a follow-up email to your inquiries within a certain amount of time.
Game. Changed.
Step 5: Make it official
HoneyBook is a life-saver for this part, with their made-for-you contracts & invoice templates (which, pro tip: you can send at the same time when you select the proposal option with Honeybook’s proposal software).
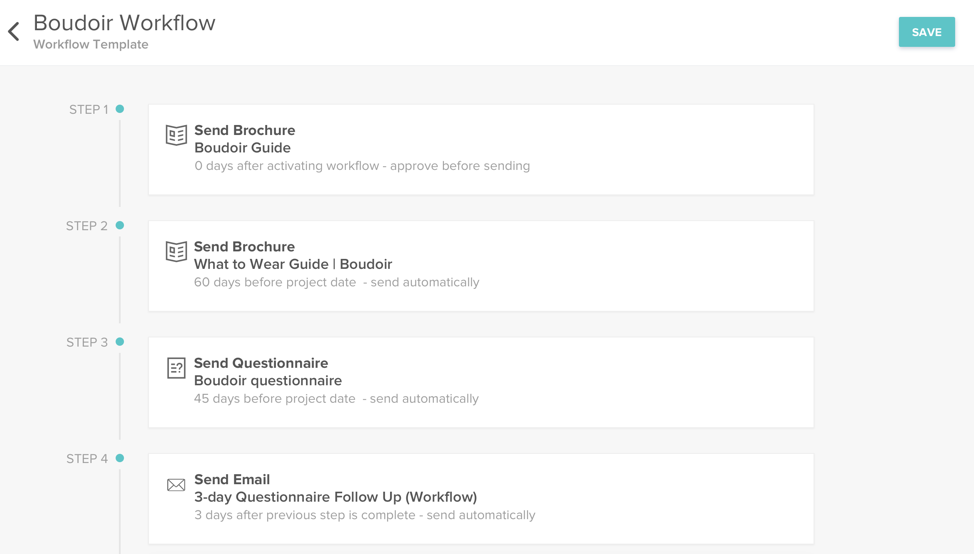
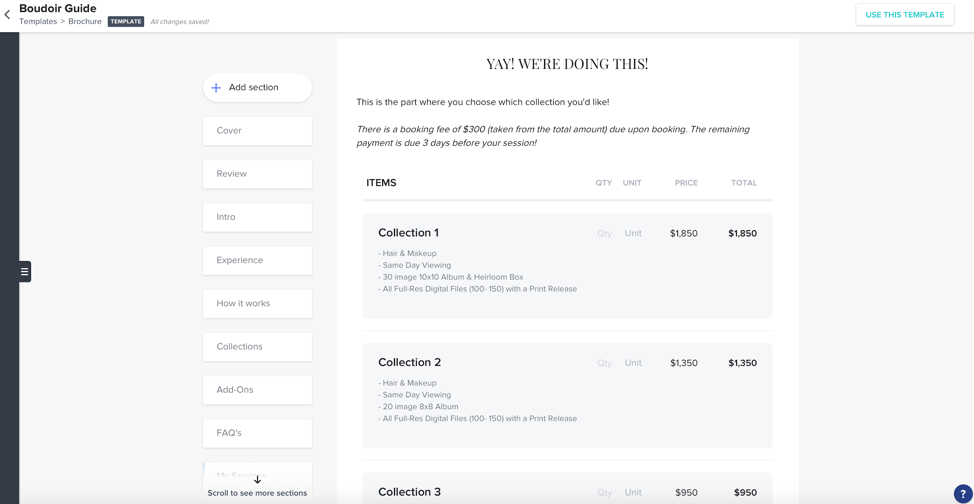
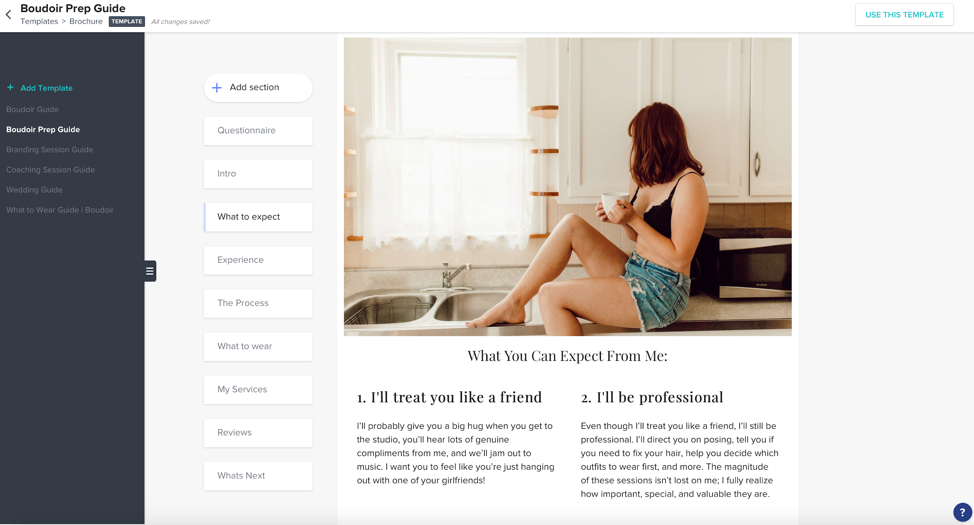
Want to make this part of the process even easier? Set up a brochure to send your client in step 3, and include a page with your service options. Your client can click the option that works best for them and HoneyBook will automatically create a proposal for you. All you have to do is approve and send!
TA-DA!! You’ve signed another client! YAY!
Step 6: Follow through on what you promised them.
This is arguably the most important part of the entire process. You’ve built their trust enough to sign them on as a client. Now it’s time to show them that it’s not all about the money, and you genuinely appreciate them.
Follow through on your word by making sure you send them any questionnaires, welcome gifts, or recommendations for other vendors.
Treat your clients like gold and you’ll keep them forever (helloooo repeat clients & referrals)!
And that’s it! You’re on your way to booking up your calendar in no time.
Have more questions on this? DM me @JoelleElizabethPhoto! And if you’re not already using the magical service that is HoneyBook, get 50% off (and a 7-day trial) on me, with this link.
Happy booking!

Ready to sell well & book more clients? Get our Small Business Sales Strategies Ultimate Guide.
Plus, 5 more posts you might like:
- How to Increase Your Sales with Printed Products as a Photographer
- How to boost small business sales with brand photography
- The best small business sales strategy: Lead with Emotion, Not Facts
- How Having a Clear Customer Journey Can Improve Your Small Business Sales Process
- How to increase small business sales with an evergreen email sequence
HoneyBook, the best crm for solopreneurs, streamlines everything you need to manage your business into one place. Manage projects, book clients, send an online invoice and get paid through our online payment software. Now peace of mind comes with just one login.


