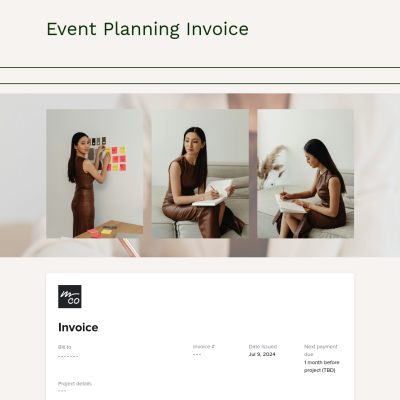
Create and send professional invoices straight from your iPhone—no printer, no stress, no wasted time.
Find a smarter way to invoice
You didn’t go independent to spend hours chasing payments or formatting invoices from scratch. But regardless of the tedium, staying on top of payments helps you protect your time so that you can deliver a better service.
If you’re already managing every part of your business yourself, you need simple solutions that work wherever you are, and that means using the tools you already have. Enter your iPhone.
This article walks you through how to make an invoice on your iPhone, how to use templates and apps, and how to choose tools that support your long-term success.
How to create an invoice on iPhone using the Numbers app
If you’re looking for the quickest, built-in solution to create an invoice on iPhone, start with Apple’s native Numbers app (Apple’s answer to Microsoft’s Excel or Google’s Sheets). It’s simple and free, and usually it’s pre-installed on iPhones. If you don’t see it, you can head to the app store and download it from there. Then:
Step 1: Open the Numbers app
Find the Numbers app and tap the app icon to launch.
If you’ve never used it before, don’t worry, it works like a simple spreadsheet app.
Step 2: Select a built-in invoice template
You will notice the app takes you directory to Recents. Ignore that for now, but it will come in handy later whenever you want to access any files you’ve previously worked on.
Tap the plus (+) icon at the top right of the screen to create a new spreadsheet. This will take you to a page of pre-formatted templates, which you can customize to your billing needs. For now, we only want to focus on the invoice option.
Choose “Invoice” from the list of templates. This gives you a pre-formatted layout with all the common placeholders that you would expect to find on an invoice, such as line items, pricing, and your business or client info.
Step 3: Customize the template in Numbers
Once you’ve selected the invoice template, you’ll see a pre-built layout with placeholder text. This is where you get to make and create an invoice that reflects your brand and contains all the important information you need your client to see.
Key sections:
To get editing, double-tap the section or field you want to change. You’ll notice there is pre-defined information that you can modify as needed.
Here’s what you can edit:
- Business Information (Top Left or Header Section):
Replace the placeholder with your business name, logo, and contact info. You can upload a logo from your Photos or Files by tapping the image field and choosing “Replace Image.” Add your business email, phone number, and website to keep things professional and accessible.
- Invoice Number and Date:
These fields help you stay organized and keep a paper trail. Update the invoice number (e.g., INV-001, INV-2024-03) so you can track each project or client. Make sure the date reflects when the invoice was created, not just when you send it.
- Client Details:
Replace the client name, company (if applicable), and contact information. If your client is a solopreneur or an individual, just include their full name and email address.
- Itemized Services Section:
Tap on each line to enter your specific services. Use clear descriptions so your client understands what they’re paying for. For example:- “One-hour brand strategy session”
- “Final delivery of edited 30-minute video”
You can also adjust the quantity, rate, and subtotal columns to reflect how you charge, whether hourly, per session, or per deliverable.
- Tax and Discounts:
If you charge sales tax, edit the tax percentage and the label. To apply a discount, either add a separate line item labeled “Discount” with a negative value or adjust the total manually. Just be clear so your client understands what’s being deducted.
- Notes or Terms Section:
Use this area to outline your payment terms, late fees, or relevant policies. For example:- “Payment due within 7 days”
- “Late payments subject to a 5% fee after 10 days”
- “Thank you for your business, let us know if you have any questions!”
You can tap and hold any section to duplicate or delete rows if you need to add more services or remove unnecessary fields. The more you customize your invoice template up front, the easier it becomes to reuse for future clients. Every time you need a new invoice, open the last edited one, duplicate it, and update the specific details.
Step 4: Export and send
Once you’ve filled in your invoice, it’s time to send it off and get the cash rolling in.
To do this, either tap the three-dot menu to export it as a PDF or hit the box with the upward arrow to send directly from the app.
Some limitations
The Numbers app is manual. If you invoice often or want a more professional, automated solution, then you may outgrow it quickly. You’ll need to manually duplicate templates, track payments, and follow up with clients on your own. That can pile onto your workload and affect your focus and bandwidth.
Learning how to avoid burnout starts with using tools that reduce your manual work. HoneyBook is one such tool, but we’ll get to that a bit further on.
Invoice templates on iPhone: What to look for and where to find them
Templates can help speed up your workflow, especially if you send similar invoices to multiple clients. You can find the invoice template on iPhone in several formats:
- PDF templates you can fill out in apps like Adobe Fill & Sign
- Numbers templates you can edit in spreadsheet apps
- Design-based templates from platforms like Canva or Etsy
What to look for in a good template
- Editable fields for services, pricing, due dates, and contact info
- Built-in tax and discount lines
- Space for custom notes or policies
- A format you can easily reuse and save in Files or iCloud
Best apps for invoicing on iPhone
Templates are helpful when you’re just starting out, but they don’t scale well. If you want more flexibility than the Numbers app can provide, there are dedicated apps designed for mobile invoicing. A few common options include:
- QuickBooks Self-Employed
- Wave
- Zoho Invoice
These apps let you build and send invoices and accept payments while tracking the invoices for you, so it’s much less hands-on. Many offer mobile features like receipts and mileage tracking. They’re useful if you’re focused solely on financial tools. But there may be some tradeoffs:
- Some features are behind paywalls
- The design may not reflect your brand or service style
- Most aren’t built specifically for service-based businesses
You might end up stitching together multiple tools just to get the full picture, something that can make you feel like your business is running you, not the other way around.
Why HoneyBook is built for service-based businesses like yours
Templates and invoice apps can help you get paid, but they don’t manage the full client experience.
HoneyBook helps you send professional invoices, sign contracts, schedule meetings, and get paid, all from your iPhone. It’s designed for service providers who want to spend less time on admin work and more time doing what they love.
You can build branded, mobile-friendly invoices in just a few taps using the HoneyBook app. You can also automate payment reminders, track what your clients have viewed, and keep every project organized from inquiry to final payment.
When you use the right tools, you give yourself breathing room. Start with Numbers if you need a quick fix. But when you’re ready for something built to grow with you, try HoneyBook free and see how easy invoicing can feel.


